In the Linux operating system, proxy configuration is done in the terminal. The entire installation process occurs through the command line.
The setup process itself looks the same on any version of the system, so we will look at Kali Linux.
Instructions for setting up a proxy on Linux
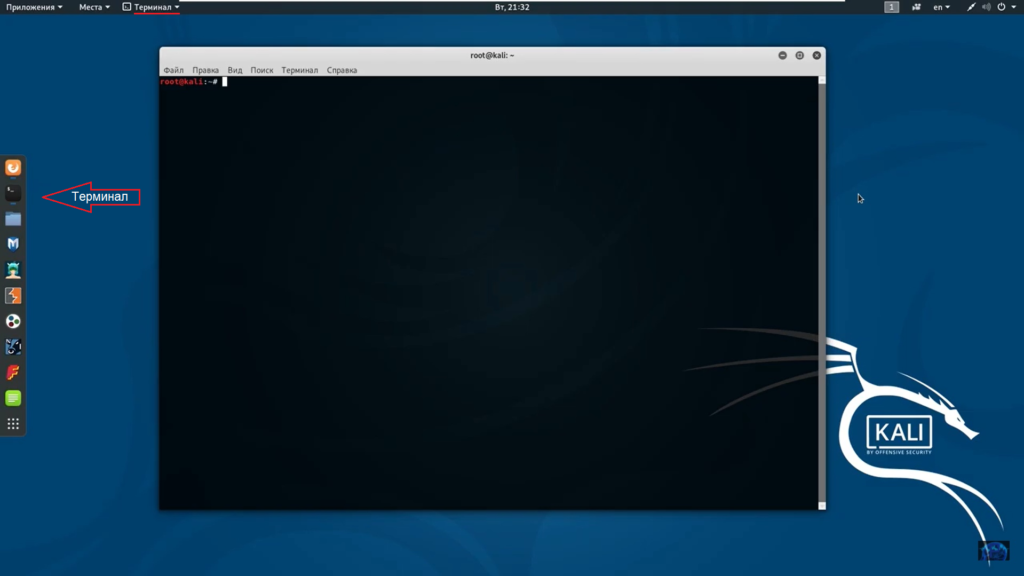
1. First, go to the terminal
2. Then on the command line we write the command “sudo apt-get install git gcc”, as in the image. The system will respond to it with a small text. We don't pay attention and move on.
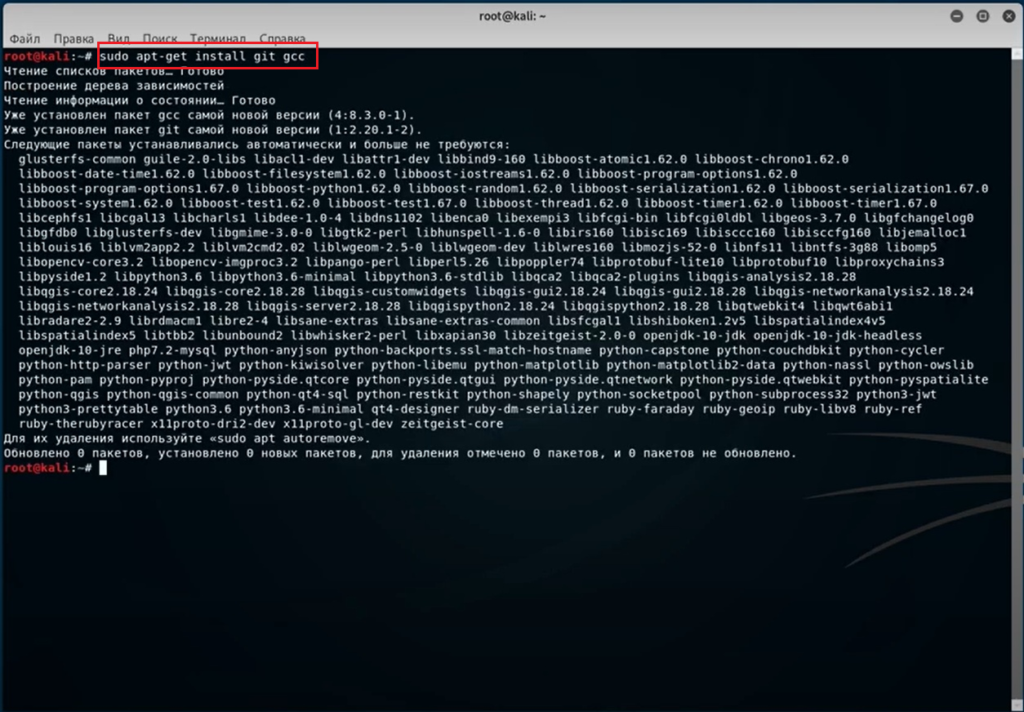
Don’t forget to press “after entering the command”Enter” to make it work.
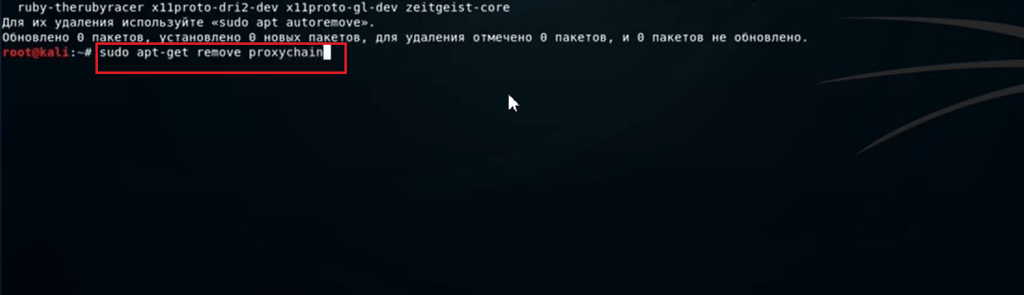
3. Setting up a proxy in Linux begins with deleting old data. To do this we write “sudo apt-get remove proxychains"
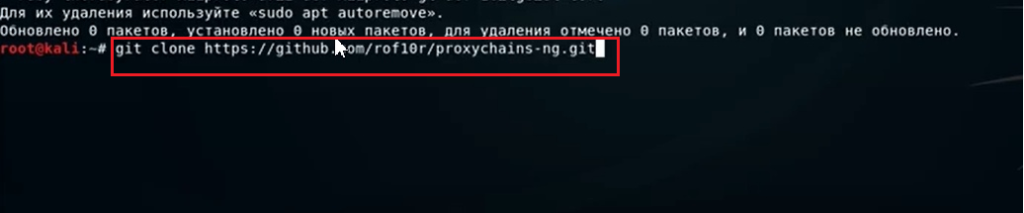
4. To copy the repository with proxy server data to a new folder, write “git clone https://github.com/rof10r/proxychains-ng.git"
5. To start working with copied files, go to their folder using the command “cd proxychains-ng” and write in it “./configure —prefix=/usr —sysconfdir=/etc" We again ignore the system’s reaction and move on.
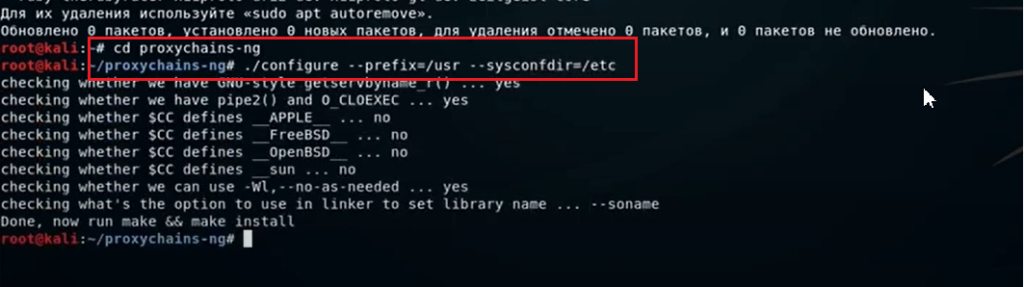
6. We begin the installation. To do this, first write the command “Make", then "sudo make install” and wait for loading. After the installation is complete, write “sudo make install-config"

7. Now we write “CD" This completes the installation process. Now we open notepad using the command “leafpad /etc/proxychains.conf” to perform the remaining Linux proxy server settings in it.

8. Go down to the very end of the notepad, where the section “ProxyList". We're interested in the last line here. We must add “#” in front of it so that the entry looks like this: “#socks5 127.0.0.1 9050”.
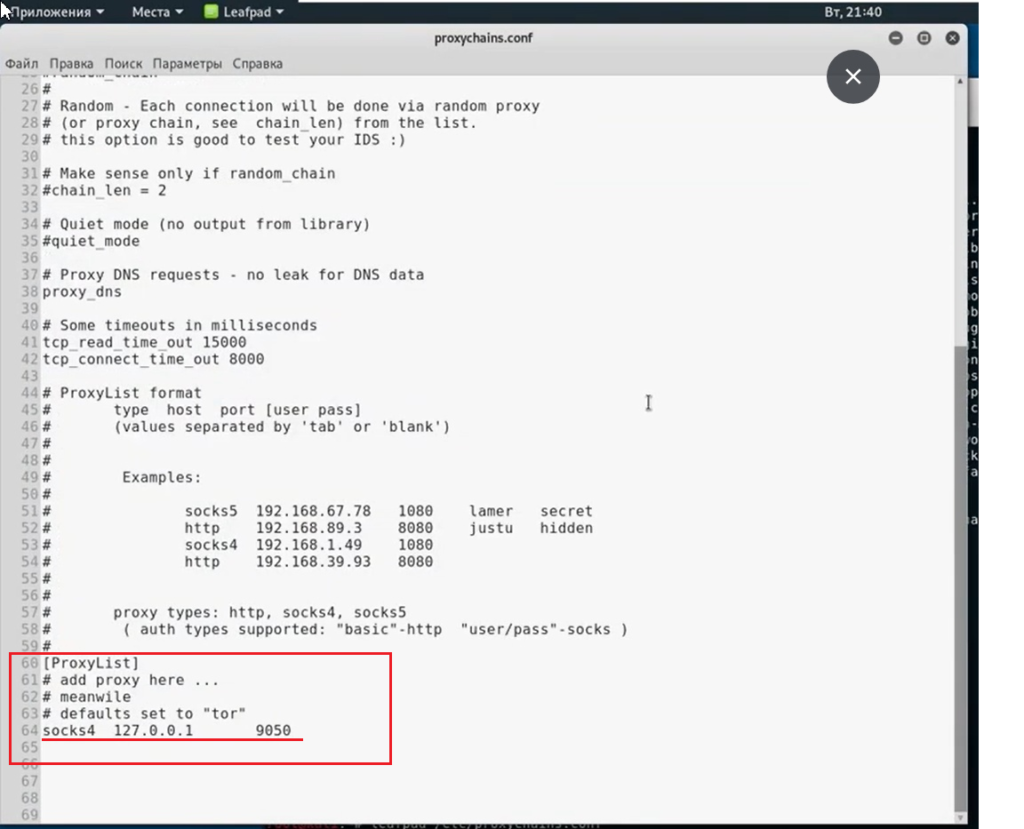
9. Copy the data of the proxy server we need into a notepad.
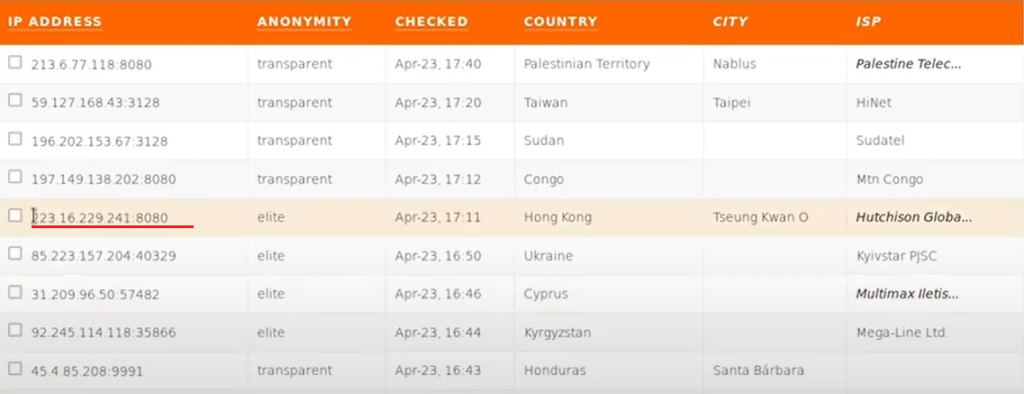
For example, we took a random free proxy from the site, but we recommend buying an individual one, because such a server is safer and more reliable.
10. Add proxy server data in the following form: “http 223.16.229.241 8080”, as in the picture, observing all the spaces. To do this, click “Tab”. Первые 11 цифр — ваш новый IP, последние 4 — порт.
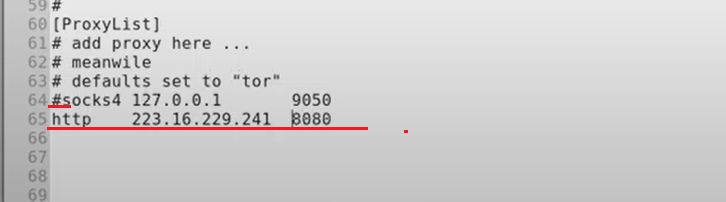
For example we used Http proxy, in practice it can also be socks5 with the appropriate port.


11. Close notepad and save all changes.
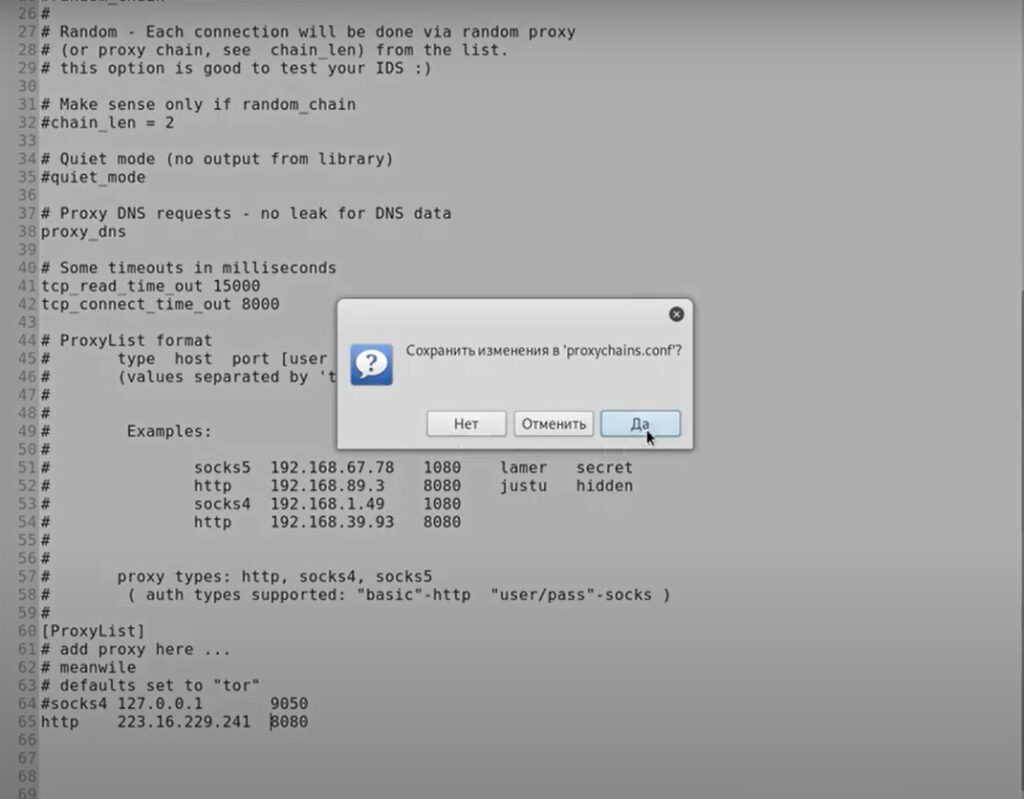
12. Now we return to the terminal and check our IP address using the command “proxychains4 wget -qO- eth0.me"
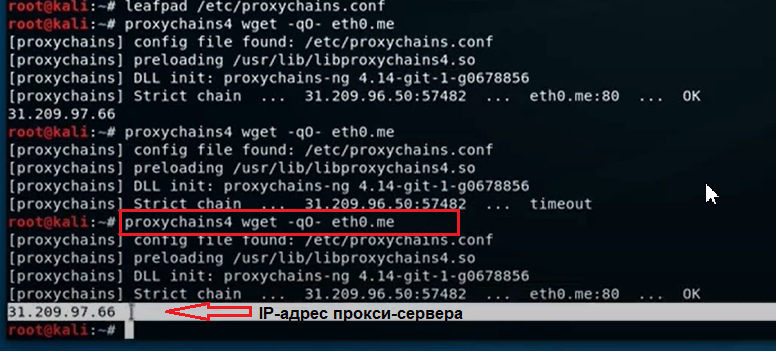
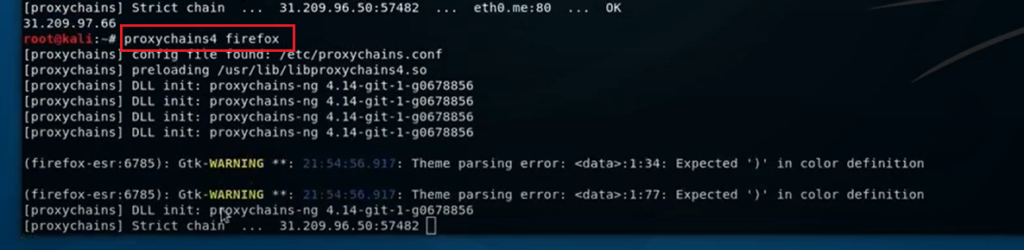
13. After making sure that the new IP address has been successfully registered, open the browser Firefox using the command “proxychains4 firefox"
14) On the website “2ip.ru” you can see how the IP address of the proxy is displayed, instead of the real IP.
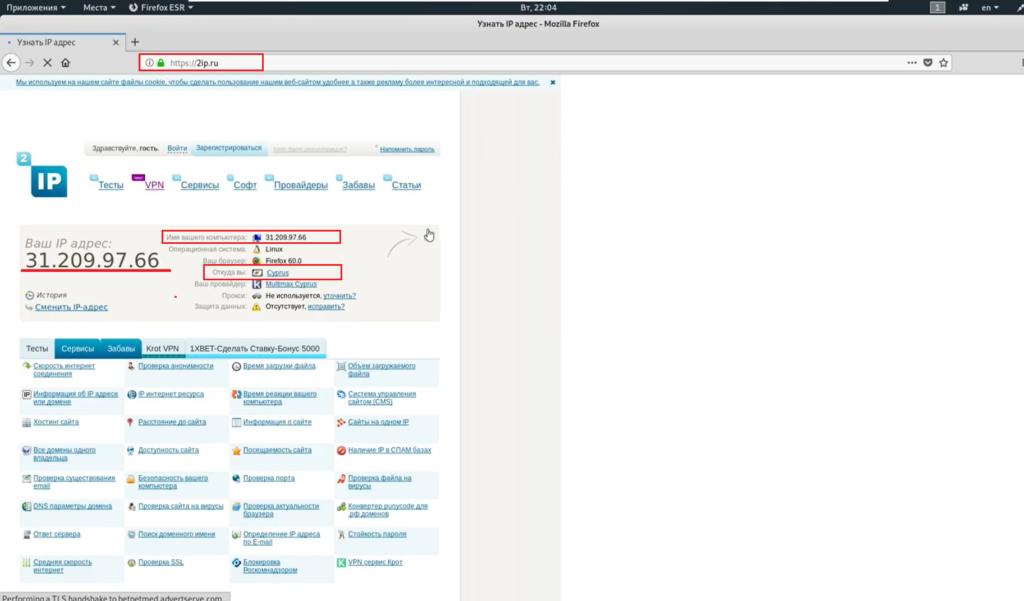
This completes the proxy setup for Linux OS. Now you can surf the Internet anonymously.